How To Get Your Podcast Online
These days I probably get an email every week or so asking me for advice on how to set up a podcast. So I thought I would write it down here to help anybody else who’s thinking of having a go.
When I decided to set up a podcast, I thought it’d be easy. Surely there were loads of guides that outlined the best way of doing it?
The answer was no. What resources I could find tended to be a load of really geeky, overcomplicated blogs that left me none the wiser. So I ended up working it out myself, which led to me setting up the Looking Sideways Action Sports Podcast.
This is by no means an exhaustive guide; it’s just the way I did it, and what worked for me. So use it as you see fit. Be warned – I have emailed similar set of instructions to friends who read it and then promptly shelved plans to start a podcast. It is a bit complicated at the start. Good luck!
Equipment you’ll need to record
1. A digital recorder
I use a Zoom H6 digital recorder. It’s a fairly large investment (link here to buy one) but I can’t stress how important decent audio is if you want people to actually listen to your podcast. I’m fairly militant about the audio quality of my podcast, although obviously Covid and remote recordings has made this much more difficult to police (more on this later). The H6 has four channels which I like ‘cos sometimes I record more than one person. If you don’t intend to do that, then the Zoom H4N with two channels will do the job and is much cheaper.
Got to be honest, I sometimes find the Zoom a bit stressful – it seems to eat SD cards if there’s any loss of battery power, and I’ve had issues with overwriting files, losing interviews etc. The easiest thing to do it just take the files off the card as soon as they’re done, and store them on your computer or a hard drive. I guarantee the one time you forget to do it is the time you’ll lose an interview. Yes, it has happened to me.
2. Microphones with leads and pop shields
I use SM58 mics with pop shields to cut down on sibilance and background noise. They’re basic mics that you can throw around and travel with, and they work fine. You’ll also need mic leads to attach your mics to your Zoom.
3. Desktop mic stands
So I’ve never really bothered with desktop mic stands, and have always just asked guests to hold the mic. Which has worked fine, apart from when David Carson flat out refused to do it, meaning we had to improvise by putting his mic in an empty pint glass. True story.
Not essential, but if it makes your guest more comfortable, it could be a worthwhile investment.
4. Headphones
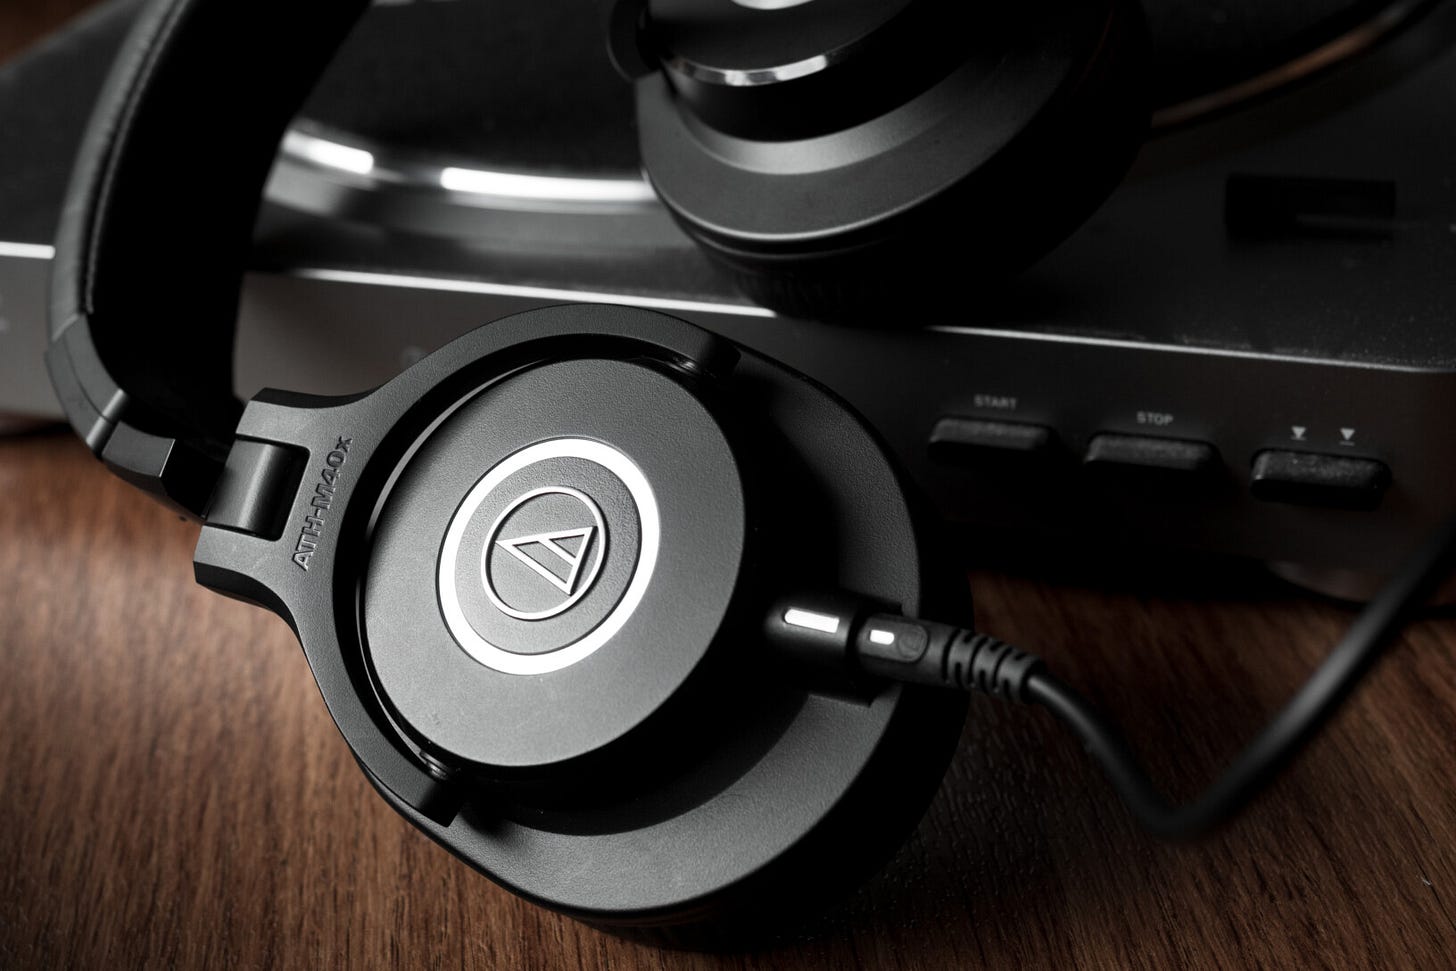
And you’ll need headphones so you can plug into the Zoom and keep an ear out for volume levels during the conversation. Get ready to spend a lot of time gesturing to your guest to move closer to the microphone. I use these.
5. Recording remotely
Before Covid, I was a total snob about recording remotely. I thought it was lazy, the sound quality was usually terrible, and the lack of direct social contact made for a clunkier conversation. On the rare occasions I did do it, I’d send my guests a Snowball USB mic so at least the audio quality was a little better.
Now? I’m still a total snob about recording remotely. But lockdown meant I had little choice, so I just got on with it. These days I use a programme called Zencastr (thanks Chris at the excellent Downtime podcast for introducing me to this) which is specifically designed for recording podcasts, and is supposed to mitigate the factors such as sporadic internet coverage and dodgy mics that can make podcasts recorded this way so unlistenable.
Does it work? Hmmm. Maybe 70% of the time. The rest of the time it is as prone to dodgy internet connections and shite mics as Zoom and the rest of them. Worse, it sometimes completely fails to save perfectly recorded conversations, as I’ve had happen to me twice now following conversations with Kepa Acero and Tarek Rasouli (on both counts, I’m still cringing tbh).
My view is that there’s still no substitute for recording a conversation in person, but when that isn’t possible this set-up as as good as I’ve found.
Getting your podcast onto Soundcloud, Apple Podcasts and Spotify
So you’ve recorded your audio. Now the tricky stuff starts, at least initially. Here’s how you do it.
1. Upload your podcast audio file to Soundcloud
You’ve got a lot of options here, but I’m going to focus on Soundcloud because it’s what I use for Looking Sideways and it seems works fine. This is pretty straightforward, but you will need a Pro account to make sure you have enough storage. Just be aware that Soundcloud has some specific requirements.
Your logo will need to be at least 1400 x 1400 and max 3000 x 3000 pixels, at 72 dpi and in JPG or PNG format.
You also need to make sure the audio file is the requisite quality (find out more about that at this Apple blog).
2. Write your podcast episode description
This is the description that people see on Soundcloud when they listen to your podcast. It looks like the picture above.
Be aware that whatever you put in at the Soundcloud level is what comes out at the end in iTunes. That includes the file name, episode image/logo and tags (on the actual MP3 I mean), podcast category (very important) and the above written description. So it pays to get this right and make sure you’re taking care of every detail correctly.
Click this link for the full breakdown from Soundcloud.
3. Send your podcast to Apple Podcasts
Congratulations. You have now created a podcast that lives on your Soundcloud page. You could just leave it there (plenty of people do) but you probably also want to make sure it appears on Apple Podcasts as well.
So basically what happens is this. The Apple Podcasts app (yes, the one on your phone) ‘draws’ the podcast from the RSS feed sent out by Soundcloud. Don’t worry about what an RSS feed is; it’s basically just a web address but you have to tell Apple Podcasts to look at it and grab it. These RSS feed details are in the Settings on that Pro Soundcloud account I told you to set up, which is easy to find. So grab that and hold that thought….
4. Set up an iTunes Connect account
…because you’ll also need an iTunes Connect Account. This is where you enter the Soundcloud RSS feed which works its fiendish digital magic and tells Apple Podcasts all about your podcast and episode details, and makes it appear on the Apple Podcasts app.
Once you have done this two things happen which caught me out the first time I set up Looking Sideways. You’ll need to…
5. Wait for Apple Podcast Approval
Yep. Someone actually listens to it and checks everything. Turns out you can get caught out for not having the right size artwork, not saying it is explicit when it is, and various other reasons that people on message boards across the world get very, very worked up about. When they do approve it, it then takes up to 24 hours to appear on the Apple Podcasts app. Wait! We’re still not done. You’ll also probably want to…
6. Set up tracking
See, I told you it was complicated. Tracking helps you work out who is listening and where they’re listening. I used Podtrac which is free. The good thing about that is if you use it (to use it you enter a code into SoundCloud which gets added to the RSS – don’t worry this bit is easy) then your original file tags (on the MP3 file I mean) get sorted out for you into very SEO and iTunes friendly terms. Which is nice (and apparently important).
The thing about podcast tracking is it’s like the Wild West and there’s still not a recognised or universally agreed way of measuring audience size. There are also a shedload of developers out there feverishly working on platforms they’re trying to sell to both podcasters and advertisers to monetise the whole thing.
My advice is don’t worry about it. Who cares? If it’s any good, people will listen to it.
7. But what about Spotify?
Spotify used to be a pain because they had a Beta version and you had to get approval. These days, given they’re the biggest player in the podcast world, they’ve made it really easy.
You’ll still need an original host like Soundcloud, and it involves our friend the RSS feed, but it seems to be much more straightforward. Read this link to find out more.
8. That’s it
Don’t worry. You don’t need to do this every time. Once approved, each subsequent episode will magically appear in Apple Podcasts once you’ve uploaded it onto Soundcloud (yes you do need to do that bit every time).
If you still have questions, feel free to email me or DM me on Instagram and I’ll happily try and help.
Now all you have to do is make the actual podcast, set up the website, man the social feeds, worry about YouTube, book the guests, edit the audio, field the smart arse comments and all the rest of it. Good luck!





Very generous of you to post the How to Guide. I’ve got no plans to create a podcast myself, but I found the guide really interesting. I completely agree with the requirement for excellent sound quality … its something that makes your podcasts so enjoyable. Have a great weekend.